Events / Allseated Event Floorplan Software For Event Planning Needs
The ability to design event floorplans and work remotely with vendor teams and clients using 3D floorplan software is critical to the continued success of event businesses.
When looking for event planning software, there are many benefits to using Allseated’s event planner software to meet your planning needs.
Some essential benefits of using Allseated’s event planning software when planning events include:
- Ability to design floorplans to-scale using floorplan creator
- 2D/3D floorplan viewing with virtual walkthrough capabilities
- Arrange seating charts
- Easily manage event guest list
- Utilize virtual designer tools for tabletops and buffets
- Generate reports
- Manage timelines
- Virtual Reality allows venues to sell remotely
- Book new business without onsite meetings
- Plan virtually with clients
- Virtually tour event spaces and layouts from anywhere
- Collaborate in realtime
- Increase ROI and improve operational efficiency
Allseated’s event planning software and event design tools make it easy and efficient to work with clients to design floorplans to scale, view in 2D and 3D, manage guest lists, arrange seating, virtually design tabletops, and take virtual walkthroughs of layouts to eliminate the need for onsite meetings.
Easily Design Event Floorplans To-Scale
With all wedding floorplans designed to scale in 2D with the ability to view in 3D, event professionals love collaborating within Allseated using the floorplan creator to create layouts. Allseated’s event floorplan design tools make it very easy to customize details and most importantly, ensure accuracy.
Did you know that one in every ten events in America is created in the Allseated platform? As such, most venues already have their event floorplan templates uploaded into the Allseated platform. If someone else held an event at the same venue and used Allseated, the event space floorplan is stored and ready to be used by you! If you have any changes to the existing event floorplan, we can accommodate you.
If the floorplan template isn’t already in Allseated, there are three main details we need from you to upload your floorplan:
- The name and address of your venue
- Dimensions of the event space
- Perimeter walls of the event space
We require the name and address of the venue so we can keep track of it and thus give you access to it. We also search the address in our database before building your floorplan layouts to ensure the venue is not already in Allseated.
We need the dimensions of the event space in order to get the event floorplan built to-scale. And, we need perimeter walls of the space because that shows us the parameters of the dimensions and allows us to scale the floorplan.
Let’s say you have the map of the event floorplan, You can upload your floorplan from within your Allseated account using the Floorplans Wizard. We take your event floorplans and then scale them, remove the tables and other movable objects, and convert them into a file type that can be viewed in 2D and 3D.
Once you upload the floorplan, the process of building your floorplan takes 24-72 hours depending on which package you selected during the upload process.
How to Find Your Event Floorplan in Allseated
If you registered on the Allseated site as a venue, the wedding floorplans are in your account and you can create an event! Simply go to Seating, click New, then click Venue Hall, and select the floorplan layout you want to work with for your event. You will need to give the event floorplan a name, and then click Finish.
If you registered as a planner, caterer, or host, you need to create or go into your event, click on Add Venue, and search for the name of your venue. From there go to Seating, click New, then click Venue Hall, and select the party floorplan you want to work with for your event. You will need to give the wedding floorplan a name, and then click Finish.
You only want to register as a venue if you are an employee of the venue.
How To Register In Allseated
Are you an event planner who will be doing multiple events at multiple venues? Register as a planner.
Are you a caterer? Register as a caterer.
Are you a bride, groom, or someone who is hosting an event? Then the host is the user type for you!
Whatever way you register, you’ll have access to the floorplans you sent in. If you register as a host, planner, or caterer you’ll have access to the thousands of venues available on the site already.
Event Floorplans
A major benefit to designing wedding and event floorplans using Allseated’s 3D floorplan software is the ability to view layouts in 2D and 3D. At any time during the online floorplan design process, easily, it’s easy to switch from 2D viewing to 3D viewing to take a virtual walkthrough of the layout. The 3D viewing options include Bird’s Eye viewing which allows you to see your event floorplan in 3D from an above view. It’s also possible to virtually walk through the online floorplan layout in 3D via 1st Person View as if you were taking a virtual walkthrough of your event floorplan layout. The many varieties of 3D floorplan viewing options help to ensure that you’re 100% satisfied with the layout during the design process. This makes the day of the event seamless, accurate, and in line with your event vision.
There are many features available to users when designing event floorplans using Allseated event layout software.
Using Allseated’s floorplan creator to design a floorplan you can:
- Select your tables, chairs, objects, and furniture
- Customize spacing
- Join tables and/or knock off chairs
- Include spacing for dance floors and entertainment areas
- Mark exits within the layout
- List any planning details and/or notes directly within the floorplan
- Save favorite objects and templates for future layouts
- Create custom groups and save to favorites
- Upload files (including JPG, PNG, PDF) to floorplan

Allseated VISION+ Floorplan – The Plaza New York
Building Event Floorplans in Allseated
In the seating tab, click on the new floorplan button. And on the left, you have two options: venue or custom. “Custom” lets you create a basic square or rectangle. But when you click “Venue”, it will give you the option to choose between the floorplans that we built and scaled for that specific venue.
Once you are ready to start working on the floorplan, click the Objects tab. If it’s your first time in the system, it will open up in the library.
You have the ability to create a favorites library by clicking the star to the left of an item. When you change your view, from library to favorites, it will pull up only the objects that you’ve starred.
Once you are ready to start placing objects, it’s a click and click system. You click to pick it up and click to put it down. Each time you put a table down on the floor, when you click on it, a box will pop up. You have the ability to give it a name and you can change the table type, the color, the table number, and the chair orientation.
If you’re looking to change the number of chairs around the table or the positioning of the chairs, use the Chairs tab in the top right corner of the box. You can also clone a table. If you’re on a Mac, use Command C, Command V to clone. If you’re on a PC, it’s Ctrl C Ctrl V.
You can also click and drag your mouse around the entire selection so that they’re all highlighted where you can switch out tables, change colors, rotate, and clone the whole group. You can also space them out equally. If you don’t want to have to re-space and realign everything, you have the option to set your minimum distance between the tables.
Toolbars Available When Designing Event Layouts
There are two toolbars to work with within your event. T T is a text tool, you can place text anywhere on the floor, it floats on your mouse and you just click to put it down. You can also put text outside of your floorplan to act as notes for different vendors. When you print or download it as a PDF, all of this information is available to you altogether.
Next, we have a square drawing tool and a circle drawing tool. These are for any custom shapes using a square or a circle like a stage or dance floor. To choose the shape that you’re using, use the drawing icon and click to start drawing, and click to put it down. Once you put it down, you get a box that pops up to label this. You can change the size and the color of the label, or hide the label altogether. You can also hide the dimensions. You have the ability to change the dimensions manually, and add a height to your item. As a reminder, you can clone this item, rotate it, change the color, and lock it in its place. Locking items in place allows you to put items on top and the locked item will stay as it is.
The square drawing tool can help you to import an image onto a floorplan. You can import your client’s logo, or if it’s a social event, maybe the client’s monogram. To do this, draw the shape, and instead of filling it out with a label and changing the size, you click Upload file. You choose which file you’re uploading. Once you upload the file, you have the ability to crop it, resize it, or make it look like a watermark. You can also lock it in its place.
The line drawing tool makes the floorplan easier to read.
The chair tool lets you create bulk theater-style seating. You can choose the shape, number of rows, number of chairs per row, the type of chair, and the distance between chairs and rows. You also have the ability to remove chairs from the center to create an aisle. And you go through and edit, the chair count is continuously updating at the top and at the bottom of the box.
The last tool on this toolbar is for air walls or pipe and drapes. You will click to start drawing and click to put it down. And once you put it down, you have the ability to choose if you want it to represent an air wall or pipe and drape. You can change the distance, the height, and the color.
That brings us to the toolbar at the top. The backward arrow is to undo. This will undo what you did step by step. The I tells you how many tables you have, how many chairs you have, and how many theater-style seats you have. The icon that looks like a robot is your template option. This will help you to save this layout to reuse in this room. This is a great way to create a recurring event.
When you click on the ruler there are three icons. The first one is to add a ruler onto the floor. You can click and drag to measure between any two points. The second ruler is to delete the rulers. You can print with measurements showing if needed. Next, you can choose your minimum distance, the unit that you’re using, and the chair type. We also have a grid. If you prefer to work in a grid setting, it’s a great way to see the distances between your walls and items in the floorplan. Again, if you print with this grid turned on, it will print turned on.
The object displays give you the ability to show or hide table names and numbers, and chair numbers.
You can show the table occupancy, which will come into play with the guest list and the seating.
Seat count shows the number of chairs at each table. With the seat count and table occupancy, you can see the number of seated guests vs. the total number of guests on your list. There is also a re-number option if using the custom table numbering feature. The pie chart color-coordinates the tables. There is also the option to print or save your floorplan as a PDF.
Another great feature is Allseated’s 3D view. Every floorplan layout can be viewed in 3D with options to view in bird’s eye or first-person view.
Auto Layout
Auto layout is the quickest and most convenient way to place tables. When you hover your mouse over any object in the library, or in your favorites, there is a little icon in the bottom right corner that will say auto layout. When you click that, it will give you shapes and distances.
Once you select what shape you want, and the distance between your tables you would like, move your mouse to the floorplan. Here you will click and drag over the space that you want to cover with tables. It will automatically populate with those tables. When you let go, objects are still selected because you can still choose different shapes or different distances within the floorplan. If you click OK, all the tables are released, and they’ll go back to acting as individual tables.
The square and banquet tables work the same way. You can either remove chairs from the ends and push them together for one long table. Or, you can place the three tables on the floor. Instead of removing the chairs, you can simply select all three tables, and choose the join option, which will automatically turn the table into one long table with one table number. As a reminder, this will have the same editing capabilities as any other object and all seated.
It’s possible to also differentiate between tables with seats and tables without seats. In the library, there are tables with no seats. You can put these on your floorplan to represent a buffet, a cake table, or a registration table.
Floorplans Tab Icons
The pencil lets you edit what you created. This allows you to change the name or change the room. Keep in mind if you change the room, the scale for all items used will change. The next icon, a double paper with a plus, duplicates your floor plan.
The lock icon makes your floorplan private. If you have invited someone into the event and you make it private, they will not be able to see it.
“The X” deletes your floor plan.
The forward arrow gives a link to share the floorplan. You can send this link to anyone who is not in the system and they will be able to view it. Allseated allows you to collaborate in real-time so that anyone with the link can see edits immediately.
Allseated Physical Distance Tool
Allseated has launched a revolutionary new technology that enables the creation of social distance floorplans providing the Events Industry with a path to safely reopen as COVID-19 restrictions are eased. This physical distance tool for event floorplans allows planners, venues and other event stakeholders to plan event layouts incorporating new social-distancing guidelines, and dynamically ascertain new room capacities, ingress and egress, and foodservice protocols while ensuring the safety of event guests and staff as paramount.
With Allseated’s Physical Distancing Tool, you can:
Give clients confidence by designing floorplans with guest and staff safety at forefront
Create layouts to meet distancing guidelines to run a safe distance event.
Visualize the event floorplan with distancing in place.
Better understand how new guidelines will affect capacity.
The Physical Distance Tool was recently featured during a segment with NBC News NOW to discuss how Allseated’s event technology is assisting wedding venues, planners, and clients open back up and get back to planning events safely.
Shareable Link to Event Floorplan
With a shareable link that is easily generated from a floorplan, you are able to send the event floorplan to someone without having them listed as a user for the event. This allows them to view the 2D/3D layout and move around the room without the ability to make any changes.
Outdoor Event Planning
Outdoor floorplans can be created to scale in Allseated! We can work with Google Maps screenshots or *overhead* photographs as long as they have at least one accurate dimension included. We can also work with hand-drawn diagrams but please be aware that if the drawing itself isn’t to scale, we need the area dimensions in order to produce an accurate diagram! You can upload your outdoor floorplan using the Floorplan Wizard.
Objects Library
In addition to a vast standard object library (including a wide range of tables and chairs based upon the industry standards), Allseated also has several furniture rental partnerships.
The furniture partnerships include the two largest national rental companies, AFR and CORT. This allows users to choose from a large selection of event furniture items when designing their event floorplans online. All event furniture renders beautifully in 3D.
Seating Charts & Guest Lists
The seating tab in your Allseated account provides you with access to your floorplans, guest list, and layout. Allseated’s state of the art guest list tool increases organization and operational efficiency. The guest list is an added value to clients, allowing users to do the following:
- Keep an accurate count and list of all invited guests in one place.
- List mailing information
- Group guests into categories (such as friends, family, colleagues) for even more organization.
- Keep notes
- Track RSVP’s
- Assign meal preferences for each guest, preventing the chance for error.
- Specify guests for multiple events such as wedding-related events (bridal showers, rehearsal dinners, and day-after wedding brunches).
- Arrange seating charts directly from the guest list.
- Generate reports
Easily seat guests directly from guest list at the tables positioned in the even floorplan layout.
While in the seating tab, click on the guests tab to the left, to have access to your guest list. Simply select a guest, and then click the table in your floorplan at which you want the guest to sit.
Allseated also offers the option to seat your guests at specific seats, by first placing them at a table, clicking that table, and assigning them to their specific seat.
Private Collections
It is possible to have custom items rendered and uploaded as a private collection in Allseated. The private collection option allows your team and clients to work with your in-house inventory when designing floorplans using the Allseated’s event planning software for their events.
3D Floorplan Designer Tools
Allseated’s event planning software for meetings, weddings, events includes designer tools that provide enhanced visualization for tabletop and buffet displays to-scale within the wedding seating chart and wedding floorplans. The designer tool options include place settings, flowers, centerpieces, linens, and buffet pieces, with many more objects to come.
The designer tools offer enhanced visualization and accuracy, making the collaboration process for vendors and clients much more efficient. Florists, rental companies, and event designers use the designer tools along with clients to collaborate efficiently and accurately to design the best tabletop layouts for an event.
Collaboration
When seeking wedding and event planning software for professionals, collaboration is key. Allseated provides the easiest and most effective way to collaborate with vendor teams and clients throughout the planning process. Invite your close friends and/or family members into your account for help with things like entering guest information, opinions on your floorplan and assistance in arranging your seating chart.
You can also invite your vendors into your account in order to collaborate in real-time regarding floorplan layout and event timeline.
Create and Manage Event Timelines
Allseated’s event planning software offers you the ability to create multiple timelines for your event. In addition to creating a day of timeline to keep track of appointments and schedule of events leading up to the affair time, you can also create a timeline for vendors. Collaborating with vendors within a vendor timeline will keep everyone working from the same page regarding your event. The collaborative aspect of Allseated’s event planning software with everything updated in real-time helps to keep everyone current on all event details.
The vendor timeline will assist vendors in understanding the flow of set up, event details and the timing of break down at the end of the night.
Generate Useful Event Reports
Generate useful reports that can be filtered to meet your needs. Create reports from both your guest list and floorplan which can be provided to your vendors for many useful reasons. Your floorplan report will dictate your desired layout along with your seating so that the room is set up the way you desire. Your guest list report can be given to the calligrapher for invitations, place cards and even for personalized favors.
Allseated VISION
When seeking event and corporate planning software, virtual reality should be a critical component as it allows you to experience your event before it happens and eliminates the need for on-site meetings.
Allseated VISION is a genuine virtual reality tool able which is bringing venues the biggest ROI in the history of event technology.
Allseated VISION provides venues with the virtual tools needed to offer clients virtual tours of event spaces and remote ways to plan and book events without the need for onsite meetings.
Benefits of Allseated VISION For Venues
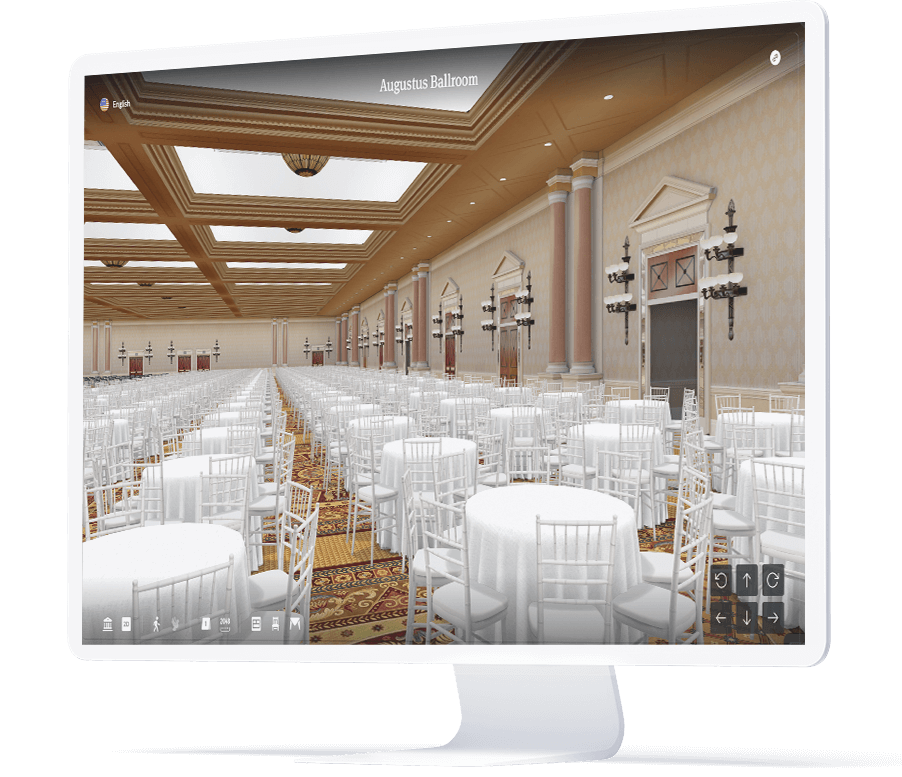
Offer Virtual Venue and Event Space Tours
Venues using Allseated VISION can offer clients a fully immersive 360-degree experience of a venue space. Venues are scanned and modeled in 3D to create a photorealistic realview of the venue spaces. This allows prospective clients to virtually tour a venue and its event spaces, view life-like table layouts and furniture arrangements, getting a realfeel for the venue without being there in-person to make decisions. This virtual capability also allows venues to show clients proposed layouts with ability to make changes in real-time.
Engage Customers Remotely
Having the ability to engage customers remotely is very important. With virtual capabilities, venues can:
- Allow customers to engage with different layouts virtually on website via widget
- Drive more traffic and increase conversions
- Provide interactive tours from anywhere in the world. No need for onsite or in-person meetings to book new business!
Website Widget
The widget helps to drive more traffic to their venue spaces, providing an interactive and informative tool for clients, opening the door to more business, and ability to sell their venue and book more events remotely. It’s more important than ever to have options for virtually event booking. Using Allseated makes it easy.
Allseated CONNECT
Venues using Allseated VISION+ have access to Allseated CONNECT, the first virtual meeting platform that brings the entire event team together for interactive onsite tours. CONNECT allows vendor teams (and clients) to virtually meet within the event space to explore the layout (with access via a multiple platforms) from anywhere in the world, eliminating the need for in-person site inspections and walkthroughs.
- Virtual Meetings – no longer need to be onsite
- Training of remote people
- On-site inspection
- Remote sales
- Operational efficiency
- Floorplan collaboration
- Visual Communication
Venues with Allseated VISION+ also have Smart Floorplans which means they can select which part of an event layout they want an event to occur. Additionally, VISION+ venues are exVo/hybrid ready. Learn more about exVo here.
Close More Business Remotely
The use of Allseated VISION and event planning software will help event professionals to close more business virtually and reach new markets without having to meet in person. As forward thinkers using intuitive technology, the ability to work with vendor teams and clients virtually opens up opportunities and increases sales quicker and more often than ever before.
With enhanced visualization and features that allow you to stand out from the competition, event pros can create layouts and suggest floorplans to clients during the design and planning stages. This added benefit can sell a client on an idea through the enhanced visualization available to them when collaborating within Allseated.
To learn more about how Allseated’s event planning software benefits your business, contact us for a demo.
Things To Know
With all wedding floorplans designed to scale in 2D with the ability to view in 3D, event professionals love collaborating within Allseated using the floorplan creator to create layouts. Allseated’s event floorplan design tools make it very easy to customize details and most importantly, ensure accuracy.
A major benefit to designing wedding and event floorplans using Allseated’s 3D floorplan software is the ability to view layouts in 2D and 3D. At any time during the online floorplan design process, easily, it’s easy to switch from 2D viewing to 3D viewing to take a virtual walkthrough of the layout. The 3D viewing options include Bird’s Eye viewing which allows you to see your event floorplan in 3D from an above view. It’s also possible to virtually walk through the online floorplan layout in 3D via 1st Person
FAQs
Yes, event planning software is very important for event planning. Allseated’s event planning software will provide you with the best collaborative digital planning tools to plan your event.
With Allseated OPs, there are many features and tools available to users to design floorplan layouts to scale. Using Allseated to design a floorplan you can select your tables, chairs, objects, and furniture, customize spacing, join tables and/or knock off chairs, include spacing for dance floors and entertainment areas, mark exits within the layout, list any planning details and/or notes directly within the floorplan, save favorite objects and templates for future layouts, and much more.